Ok I admit it- I was being lazy this Memorial Day weekend, just sitting at home watching some golf and getting a little R&R. As I was channel surfing during a commercial I came across a show called “How It’s Made.” This inspired me to write a blog about how the vinyl graphics are manufactured at Shine On Signs. Whether for windows, walls, boats, cars, floors, or something else, the process is basically the same- resulting in a high quality finished product for our customers!
 Pre-Step: Concept, Application, and Purpose
While not technically part of the process, I would be foolish not to mention it. In order to create the perfect vinyl sign or decal, we need to know where and how we are going to apply the sign. This is our first conversation with potential clients and plays a part in the material decisions and application process.
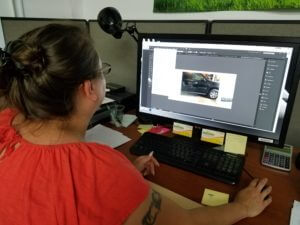
Step 1: Design
Once we’ve determined the how and why of the project, we get to designing. Whether taking predetermined design elements or logos, or starting from scratch, our designers work to create the perfect design for your project.
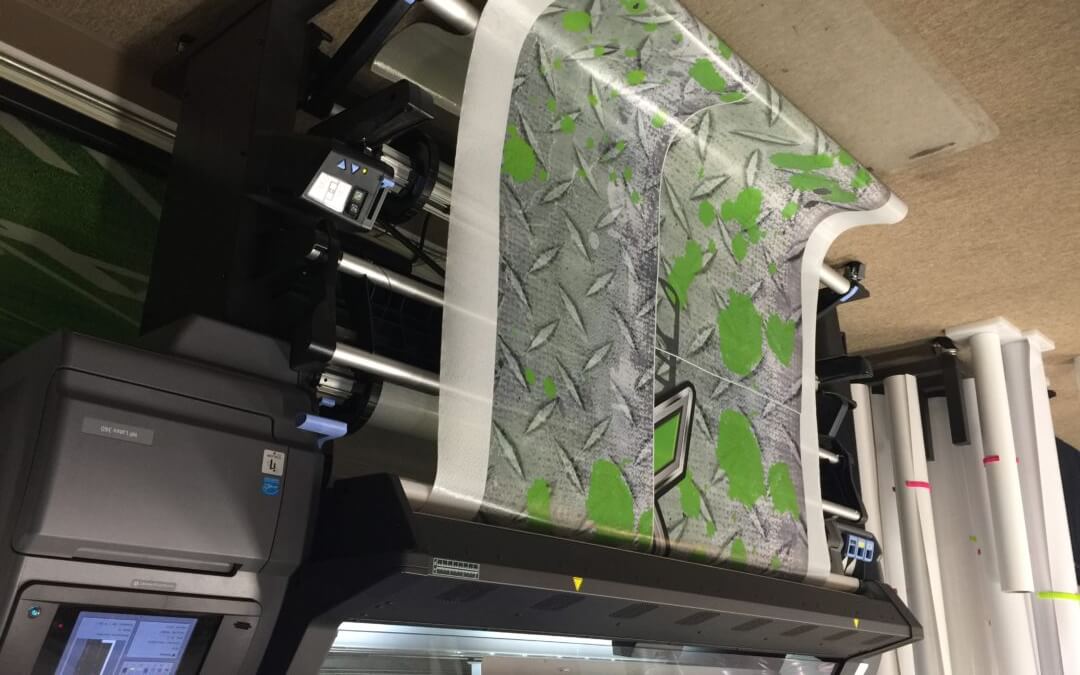
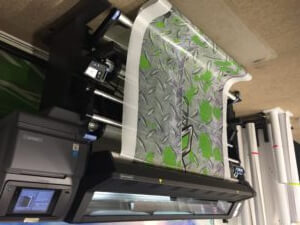 Step 2: Print
Once proofs and design are finalized, it’s offer to our wide format HP printer. Our top of the line latex printer reproduces color accurate, high-quality stunning graphics. Sometimes, if it’s a single color decal or graphic we may skip this step by using a colored vinyl and go straight to step 3.
Step 3: Plot
Once the graphics are printed on the vinyl (or designed out of single color vinyl) we send it to the plotter. Think of it as a fancy exacto knife. The plotter reads a cut file that’s part of the original design and rapidly and accurately cuts out the pattern from the larger roll of vinyl. Once plotting is done- time to put our staff to work!
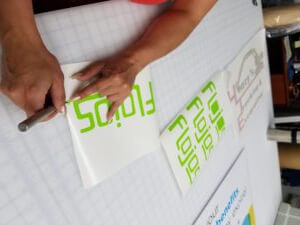 Step 4: Weed
It’s a funny name for a manufacturing process, but it does explain what our production team is doing: weeding out the extra vinyl that’s not being used in your design. Using an exacto knife, patience, good eyesight, and our special production tables, they carefully remove the excess vinyl. This isn’t just around the graphics, but holes in letters like D and P, and zigs and zags, and any other intricate part of the design that isn’t going to be applied to the final location!S
Step 5: Mask
After all the weeds are gone, and we are left with just the design to be installed, we cover it with a low tac masking tape. It’s similar to the stuff you buy at stores, just a lot wider, and used to apply – you guessed it – vinyl graphics. Using this process it allows us to pull off the vinyl backing while keeping all design elements in line, where they are supposed to be, leaving a perfect end product.
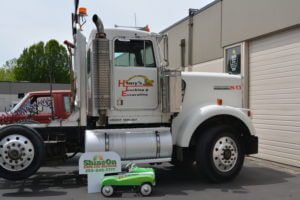
Step 6: Apply
Application is done in a few different ways depending on the size, and location of the install. For the most part, we choose a part of the design to use as a center and a leveling point. Once it’s leveled and centered (or in position), we use a hinge of tape down the middle, peel back one side of the vinyl backing, apply with a squeegee, then work back the other direction until it’s all attached to the application surface. Next we slowly remove the mask and remove bubbles if any. That’s it! Check out the video for the walkthrough!
Step 7: Step back and admire!
Interested in learning more about the process, or getting vinyl decals or graphics for your business? Contact a Shine On Team member for a free proposal.